Friday, February 6, 2015

Recycling Aluminum for Card Making


 Instructions at the bottom.


What you'll need.

Clean aluminum cans
Scissors with sharp points
Alcohol ink
Felt Ink Applicators
Cuttlebug embosser or any other embossing machine (plus plates)
Embossing folders
Paper towels
Aluminum foil or silicone craft sheets
Paper trimmer

Here’s how to do it.

Poke two holes in the side of an aluminum can with sharp pointed scissors as shown.
Carefully cut around the bottom of the can side and the top of the can side. This will remove the top and bottom of the can and leave you with an open cylinder
Cut the cylinder from top to bottom as shown. This will give you a long rectangle of raw aluminum.
Using a paper trimmer, trim the rough edges away from the long sides of the rectangle. Trim the two short sides of the rectangle. This will give you a piece measuring 8” x 3 ¼”.
For my cards, I cut this piece in half to yield two 4” x 3 ¼” pieces. (side benefit – this sharpens the blade of my cutter!)
Place the aluminum inside an embossing folder. Be sure to put the blank side of the aluminum facing the manufactures mark on the folder as shown.
Lay down a piece of aluminum foil or a craft sheet under your paper towel work surface. Alcohol ink will leave a permanent stain on your work surface so be sure to protect it. Also if you wish, you can wear gloves to protect from staining your fingers.
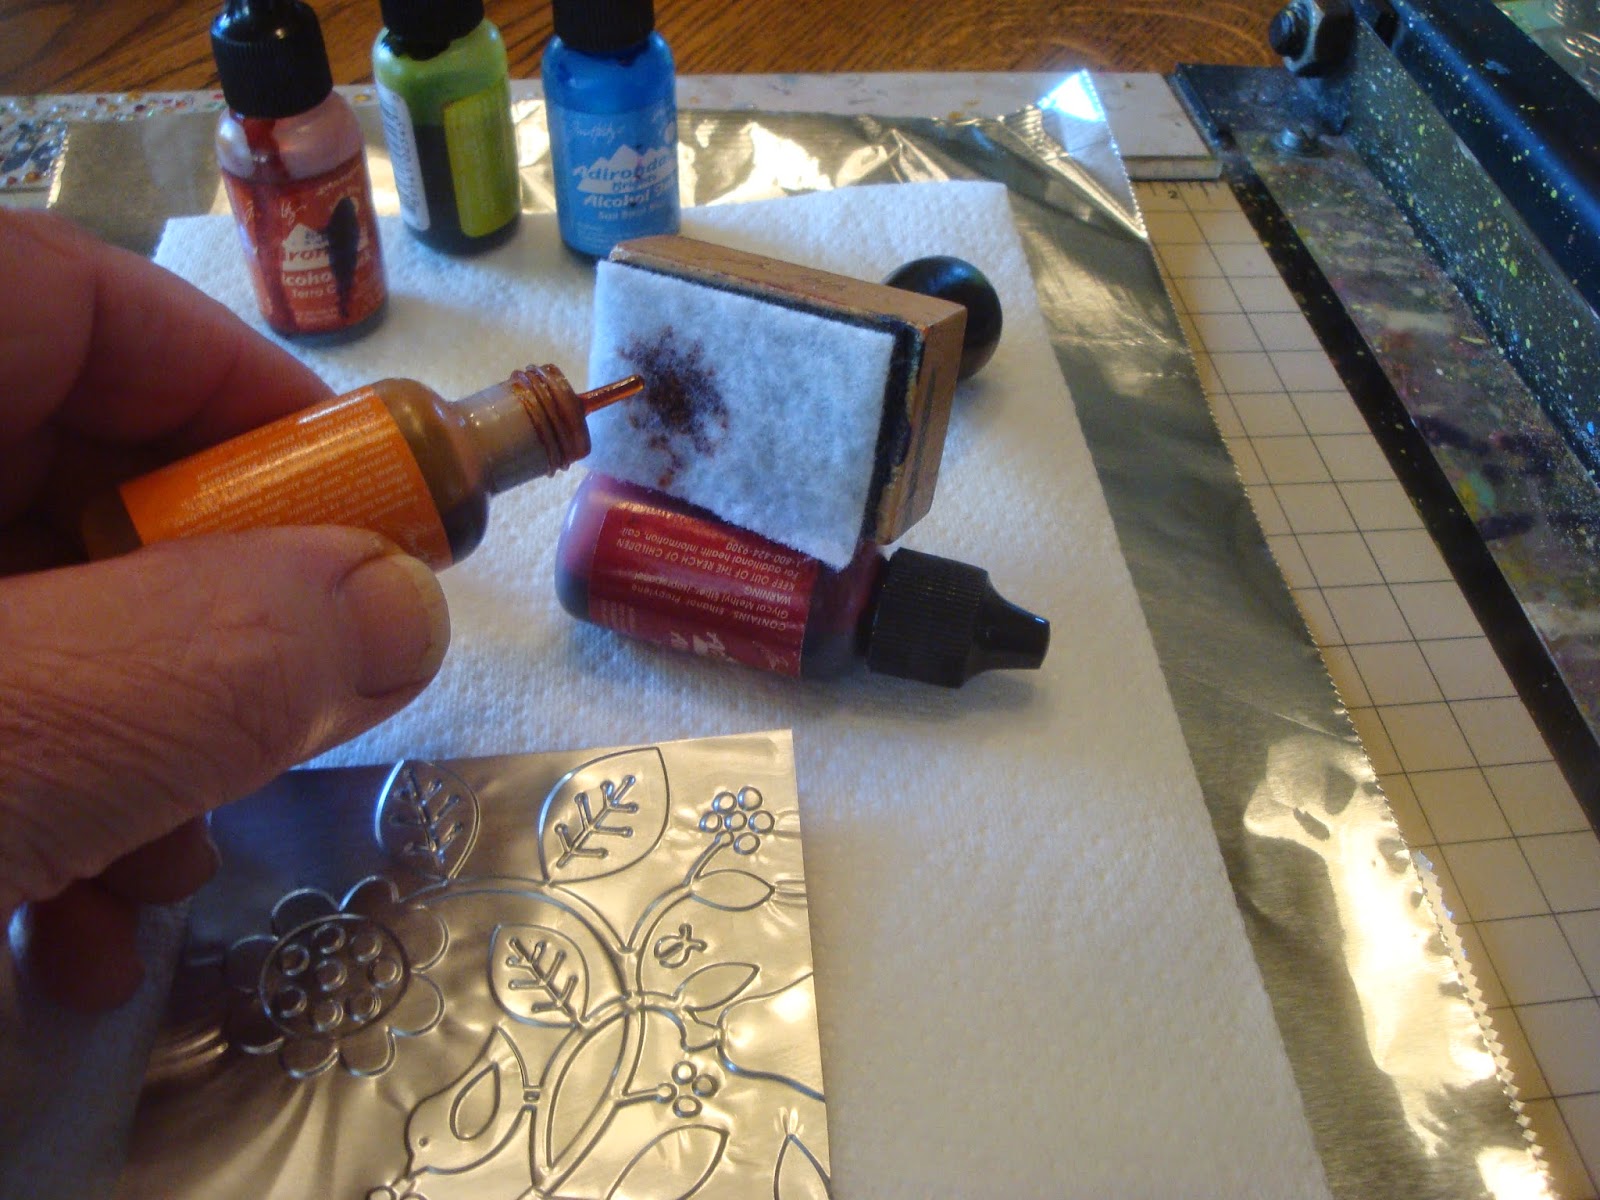
Squeeze a little alcohol ink onto the felt applicator. Rub the entire surface of the embossed aluminum to make a base coat.
Add more ink to the same pad and start dabbing the ink here and there onto the base coat.
Add drops of ink right from the bottle here and there and let it puddle. The ink will react in different ways to the texture of the design and to the dryness of the underlying layer of ink.
Experiment with the inks until you like the color placement. You can also come back in and use the applicator to “blend” the colors a bit although the object is to make the colors as freeform as possible.

This is addictive and fun and a great way to recycle aluminum!
Enjoy.

Saturday, January 24, 2015

Year of the Goat Card

Here's a card I made with my little digital goat. You can print out the image below. Enjoy!

Computer tutorial :Changing the look of your images using Picasa3 from Google


Here’s how I made the black on white left facing goat into a right facing white on black goat.

 I have an HP all in one printer/scanner.
I printed the image and placed it on the flatbed scanner.
I opened my Picasa3 program (free from Google).
I clicked on the “import” button in the upper left corner. A new window will pop up asking you to choose from where to import the image. I click on the drop down menu and find my HP 7520 series device. Click on the button that identifies your devise.
You will see several options for scanning.
I choose “Black and white picture or text” and press the Scan button.
Once the scanned image appears on the screen, click the “import Selected” button.
The newly scanned image will appear in a new file with the current date (at this time you may right click on the date and edit the file description, I just add “Chinese Goat” to the file name for easy retrieval later.
Double click on the goat. It will appear on the page where you can do all sorts of fun things to the image. If you need to, you can rotate the image by clicking the little rotation arrows right under the thin blue bar below the goat.
To reverse the direction the goat is facing, press the ctrl the shift and H keys at the same time.
To reverse the colors, click on the little tab with a small paintbrush with the green square behind it. You will see 12 options. Click the one called “invert colors” it will instantly change. Remember, you can undo any changes you make by clicking the “undo” button,
At the bottom of the screen, press the print button. On this page you will be able to choose the size of the goat and the number of images to print at the same time.

Have fun and experiment with all the cool effects you can get using this free program.

Friday, January 23, 2015

Blog Candy!

Here's a little digital stamp I made for the Chinese year of the goat. I'll post some cards a little later - enjoy!

Sunday, November 30, 2014

Cyber Monday Give-Away!

On Cyber Monday this year you can receive a free set of stamps! Just spend $15.00 on any rubber stamp(s) in my catalog and you will receive Fiona's Flock, the set of four stamps I designed this year for my littlest Granddaughter Fiona Strong. This promotion ends on Friday December 5. Happy Holidays!

Sunday, September 28, 2014

Blog Candy


Thanks again to all who participated in our Michael Strong Yahoo Group's 6th anniversary blog hop, it was fun! Here, as promised, is the digital stamp for you to download and print out. I made a card with this little Cloisonne Pumpkin to mark the changing of the seasons. Enjoy!

Saturday, September 27, 2014

Happy 6th anniversary to us!

Can it be that we've been sharing our love of paper crafting together for six years already? I am humbled and happy to be a part of this lively group of artists! And I'm happy to share a small token of my appreciation to all who participate in this hop. So, because the traditional 6th anniversary gift is candy, I would like to send some blog candy to everyone who makes a comment here. After the hop is finished I'll post a special digital stamp for you to copy and print.

I am sure you arrived here from Laura'.s Blog with her contribution to the Anniversary Blog Hop.
Here is my contribution to the Hop, It's a card that's also a shadowbox using my new Cloisonne Dove Ornament stamp. Don't forget to visit the next blog on the list, which is Shelly's Blog. But if you happen to loose your way,you find all participants on  our fearless leader Hetty's blog - http://craftchaos.blogspot.com