Here's a special little treasure box I learned how to make last week. Thank's to my friend Betty for showing me how. I now realize this one has been around a long time but it's new to me! So here is my take on an oldie but a goodie. Enjoy!
Treasure Box
Materials
Cardstock cut to the following sizes:
10 ¼” x 4 ¾” (1) body of the box
2”x2” (4) tray liners
1 ¾” x 1 ¾” (1) box lid topper
2 ¼” x 2 ¼” (1) inside lid
1 ½” x 3” (3) decorative panels on box
Washi Paper (you may substitute scrapbooking paper or wrapping paper) cut to the following sizes:
6” x 6” (4) to make the trays
6 ½” x 6 ½” (1) to make the lid
4 ¾” x 1” (1) strip to wrap the closing end of the box
2” x 3 ½” (3) to wrap the decorative panels
2 ¼” x 2 ¼” (1) to wrap the lid topper
Scissors
Glue or gluestick
Scoring tool (scor-pal or scor-it) a ruler and a bone folder will substitute)
Straightedge
Pencil
Steps
Follow the directions below to make the four trays and the box lid.
Lay the straightedge across the back of the Washi paper diagonally from corner to corner and mark a line in the middle. Rotate the paper and do the same. Mark the center with another line making an X.
Fold the four points into the center of the X and crease.
Fold back each of the four points to its corresponding outer edge and crease. (See picture)
NOTE: The next four folds are simply to make the creases in the paper which will form the square bottom of the tray.
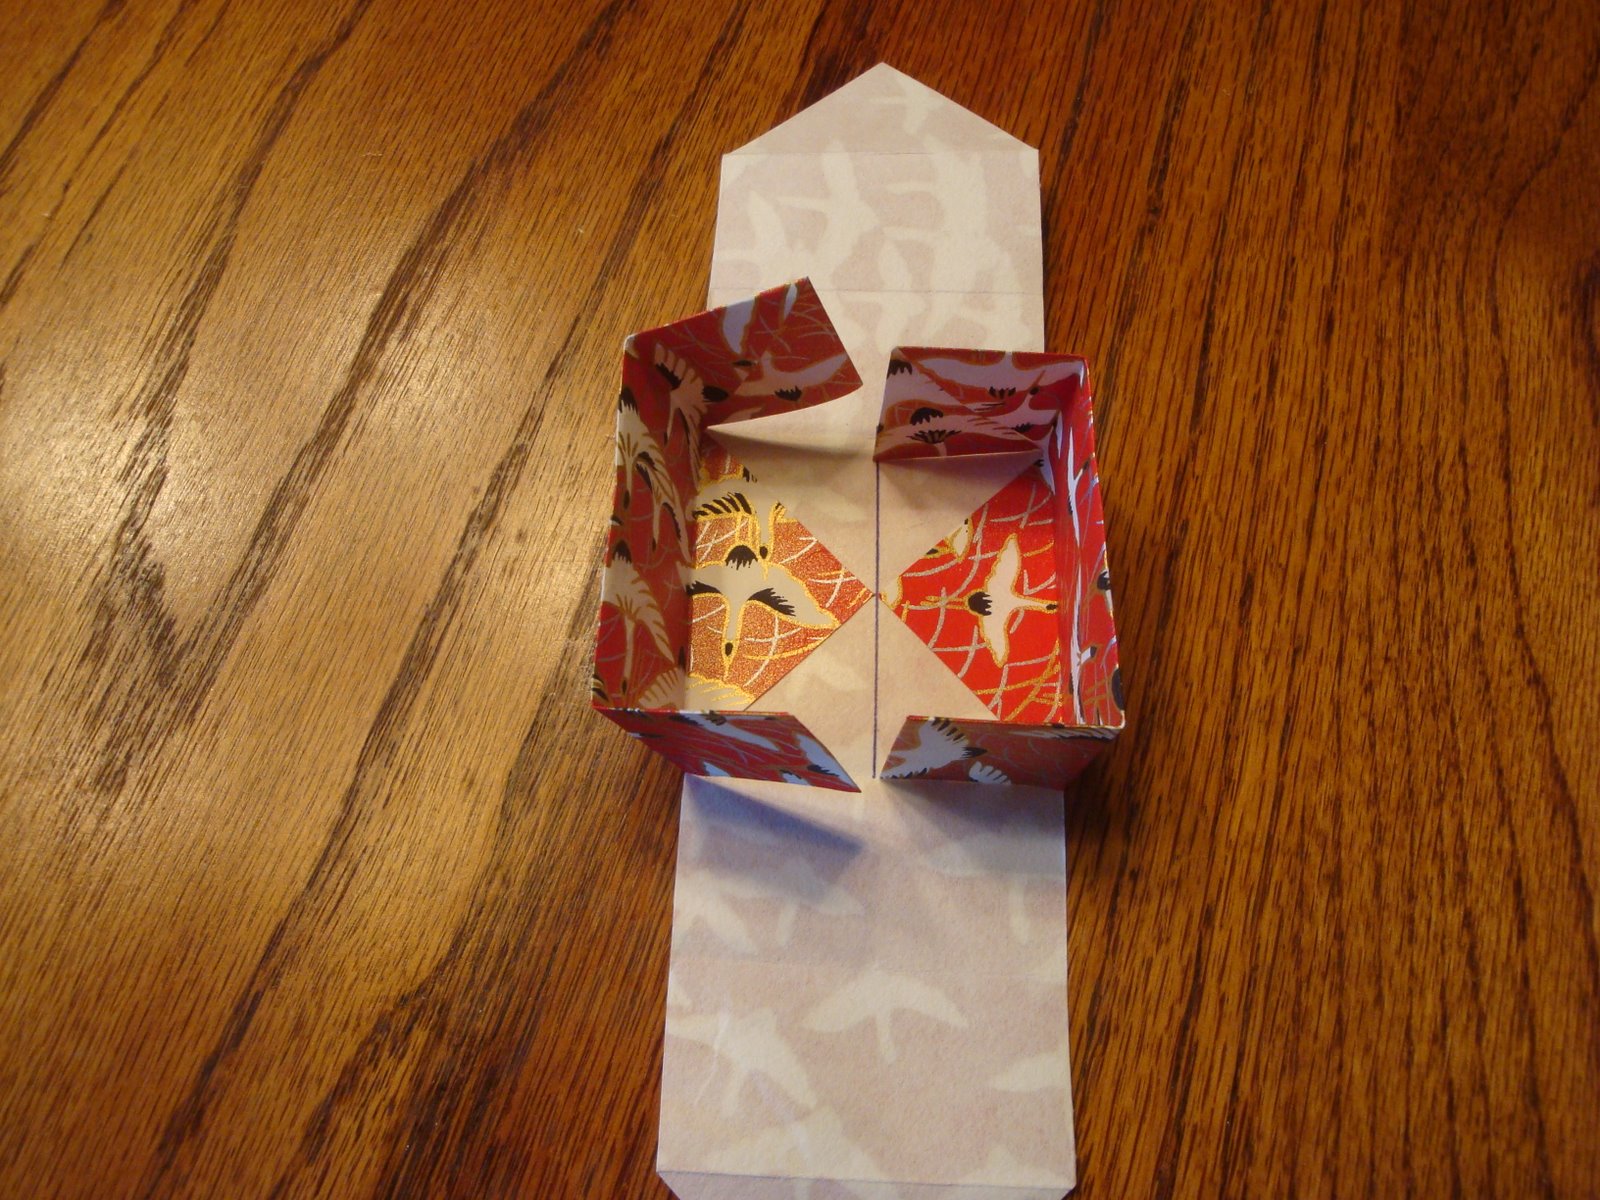
Lay the paper like a square in front of you. Fold up the bottom 1” x 2 ¼” onto itself and crease flat. Open it back up and smooth it flat. Rotate the square ¼ clockwise and do the same with the next panel. Repeat this step with the last two panels until you have formed the square in the middle of the paper which will become the bottom of the tray. (See pictures)
Lay the paper like a square in front of you. Fold open the top of the square and the bottom of the square. Leaving the two sides closed flat. Use scissors to cut four slits, two on the bottom opened flap and two on the top opened flap. Cut on the two outside vertical creases just up to the tray bottom.
Repeat this step with the other flap. NOTE: after these four cuts you should see a house with a peaked roof shape at the top and an upside down house at the bottom. (See pictures).
Fold down and glue the small triangles that are on either side of each “house” shape to the side panels. (See pictures).
Cover the bottom of the tray with glue and press down the two large side triangles. Fold in the side walls of the tray and fold the top and bottom “house shapes” up and over the walls to complete the tray. Glue a 2” x 2” square of cardstock inside the bottom of the tray for strength.
Repeat to form the other three trays and the lid. Set aside.
To make the box, score the 10 ¼” x 4 ¾” cardstock along the long side four times at 2 ¼” intervals starting from the left. You will have four identical panels. Fold to form a square cylinder. (The remaining smaller panel on the right wraps around the first panel to close the cylinder). Begin adding the trays to the inside of the box by gluing one side of the first tray at the bottom of the first panel on the left. For the second tray, glue to the second panel just above the top of the first tray. Make sure you have clearance for closing up the box. Add the third tray to the next panel above the top of the second tray. Do the same to the final tray on the fourth panel. (See pictures).
Fold the 4 ¾” x 1” Washi paper in half lengthwise. Add glue to the back and attach it to the edge of the final short panel of the box, half on the front and half on the back.
With the box closed, add the lid to finish.
To make a decorative side panel, glue a 1 ½” x 3” piece of cardstock to the center back of a 2” x 3 ½” piece of Washi paper. Miter the four corners. Add glue to the back of the cardstock and fold the mitered flaps of the Washi paper down onto the glued surface to secure. Repeat to make two more panels. Glue the panels to the sides and the back of the box. (See picture).
Make the lid topper the same way and glue it to the top of the lid. Embellish as you wish. Enjoy