Monday, June 27, 2011

Simple Tip


Sometimes if I haven't used my Pearl Pens in a while they need to be unclogged before the paint will flow. I attach a small piece of recycled foam to the pen with tape and insert a pin so that I always have one handy.
Posted by Picasa

Thursday, June 23, 2011

Monday, June 20, 2011

Black & White Basket Weave card

 
Here's one of the cards we'll be making in my class on Wednesday June 22 at The Stamp Addict. The theme is Black & White - one of my favorites. Here's how to make it:
Posted by Picasa
Black & White Basket Weave Card
Materials:
Black cardstock in the following sizes:
3 ¾” x 3 ¾” (1)
3” x 4 ¼” (1)
3” x 3” (1)
½” x 5 ½” (12)

White cardstock
Folded 5” x 5” card (1)

MSRS Constellation Cardstock (or other silver cardstock)
3 ½” x 3 ½” (1)

MSRS Butterfly stamp
Inka Gold paint (Platium) www.viva-decor-us
Pearl Pen (Ice White) also from Viva-Decor
Embossing powder (black)
Versamark inkpad or similar
Heat tool
Tape
Double-sided tape or glue
Scissors
Tissues

Steps:

Begin by basket weaving four of the black cardstock strips as shown. Tape the four strips together to secure them together. This will be the center of your woven background piece. Continue weaving the strips around the center four until all twelve are used. Tighten the woven strips so that there are no extra spaces between any of them as shown. Glue or tape one side of the 3” x 3” square black cardstock and attach it to the middle of your woven strips. Press it hard to secure. Trim away the extra overhanging strips to make a 3” x 3” square of woven cardstock strips.
Apply Platinum Inka Gold to the woven piece by putting a small amount on your finger and rubbing the flat of your finger all over the piece in a circular motion (See picture).

Layer the woven piece onto the 3 ½” x 3 ½” silver square and the 3 ¾” x 3 ¾” black square. Attach to the 5” square card and set it aside.

Rub some Platinum Inka Gold onto the 3” x 4 ¼” black cardstock in a roughly x shaped pattern as shown. Polish the surface with a tissue until it is smooth and dry (dries very quickly!) Stamp the butterfly over the “X” and emboss with black embossing powder.
Cut the butterfly out with scissors. Cut away the antennae. Add two very thin strips of black cardstock (from your left-overs) to the back of the butterfly with tape as shown. Attach the butterfly to the woven background with tape or glue. Finish with small dots of Ice White pearl pen on the butterfly wings.
Enjoy!

Basket Weave Card materials

 
Posted by Picasa

Basket Weave Card steps


Posted by Picasa

Basket Weave Card steps


Posted by Picasa

Basket Weave Card steps


Posted by Picasa

Basket Weave Card steps


Posted by Picasa

Basket Weave Card steps


Posted by Picasa

Wednesday, June 1, 2011

Welcome Baby! card challenge winners

 
Here are the three winning cards chosen in the May card challenge at EnjoyMichaelStrongStamps Yahoo group.
From left, Toni Hinchcliffe - Tampa Florida, Herma Fichte - Amstelveen Netherland, Martha Bickford - Santa Rosa California. Thank you ladies for your adorable cards. Each one is a little masterpiece!
Posted by Picasa

Fan Folded Kimono Book

 
Here's a fun and elegant book project for all you Kimono lovers. It's an art piece that showcases the beauty of Japanese paper. Enjoy!
Posted by Picasa
Kimono Fan Book
Materials:
Black cardstock:
11”x 4 ½” (3)
6 ½” x 4 ½” (1)
3” x 4 ½” (1)

Metallic gold cardstock:
2 ¾” x 4 ¼” (12 mats)

Variety of Japanese Washi paper (or similar colorful paper or cardstock

MSRS Kimono Metal Die Cutter

Thin ribbon (color should coordinate with color palette of papers used)

Cuttlebug or any other embosser such as Big Shot, Big Kick etc.

Scor Pal or Scor It scoring tool or similar

Glue, double-sided tape or other adhesive

Steps:
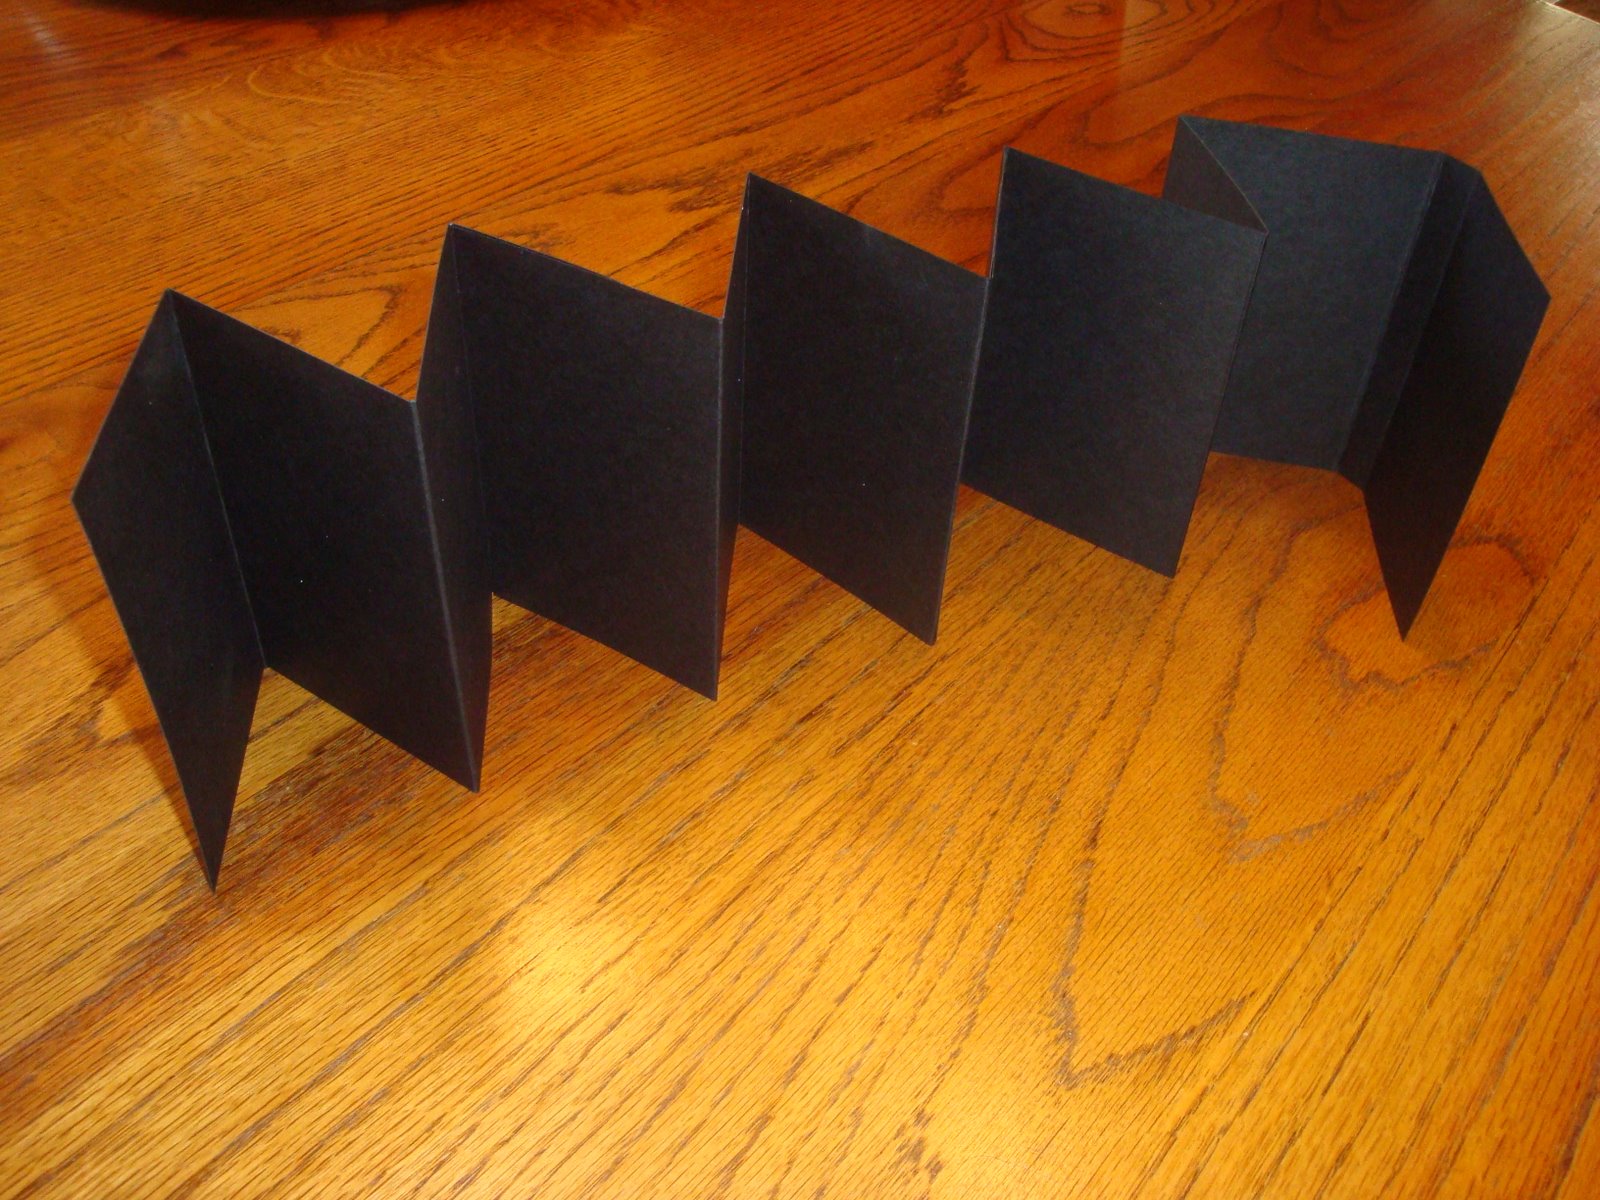
Use a scoring tool to score the three 11” x 4 ½” panels. Starting from the left side, score at 3”, 6” & 9”
This will yield a piece with three 3”x 4 ½” panels and one 2” x 4 ½” panel. Accordion fold the piece and set it aside. Repeat the scoring with the remaining 2 pieces, accordion folding each of them as well.

Score the 6 ½” x 4 ½” piece of black cardstock at 3” and ½” This will yield a scored panel with two 3” sections separated by a ½” section.

Glue or tape the four scored panels together. Cover the 2” x 4 ½” section of panel #1 with glue and attaching it to the back of Panel #2. Cover the 2” x 4 ½” section of panel #2 with glue and attach it to the back of panel #3. Cover the 2”x 4 ½” section of panel #3 and attach it to the back of the cover panel. (See pictures)

Attach the metallic gold mats to each of the 11 panels of the book as shown.
Close the accordion book up and press it flat with the cover over the front. NOTE: The cover opens from the left side.

Before attaching the gold mat to the front cover of the book, attach a 12” length of thin ribbon by taping it to the center of the cover. Now attach the gold mat over the taped ribbon.

Attach a second piece of ribbon to the back of the book in the same way. Cover the ribbon attachment with the remaining 3” x 4 ½” black panel.

Use the Kimono Die Cutter and your embossing machine to cut out 12 colorful kimonos and attach one each to the 11 inside panels and the front cover. NOTE: If the paper is too thin, you can glue it to cardstock before sending it through the embosser.

To finish, fold the book up accordion fashion and tie the ribbons together. The opened book would look great on a mantle. Enjoy!

Fan Folded Kimono Book steps


Posted by Picasa

Fan Folded Kimono Book steps


Posted by Picasa

Fan Folded Kimono Book steps


Posted by Picasa

Fan Folded Kimono Book steps


Posted by Picasa