Monday, April 27, 2009
Metallic webbing card
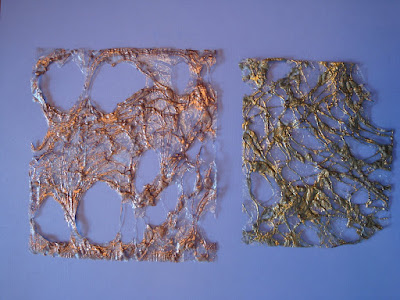
Here's a card I made using the Deconstructed Metallic Webbing. I used my paper cutter to cut a large piece for the background and a small piece to frame the main image. I hope you give this a try. I'ts fun!
How to make Deconstructed Metallic Webbing
Here's a fun technique for making collage elements.
The pictures progress from the start to finished
product. Please do this in a well ventilated area or outside. Here's how it's done:
Materials:
Plastic sandwich bag
Cardstock cut to fit snugly inside the bag
White glue
Metallic embossing powder
Heat tool
Scissors
Steps:
Place the cardstock inside the plastic bag.
Drizzle white glue randomly over the bag. Remember the thicker the
glue, the longer it will take to dry.
Sprinkle embossing powder over the wet glue and shake off the excess.
Allow the glue to dry. My sample took about 1 hour.
Using a heat tool, start to heat the embossed glue by moving the tool
rapidly over the surface of the bag. The bag will begin to shrink and
tear and the embossing powder will start to turn shiny. When all the
embossed areas are shiny, stop heating.
Cut open one side of the bag and remove the cardstock (the cardstock
helps keep the piece relatively square)
Now cut out the entire piece separating the embossed front from the
back of the bag. The piece can now be cut up into smaller pieces and
used as background or collage elements by attaching it to a card using
glue dots or double sided tape. Let's see what you can make,
Have fun!
Mike
Thursday, April 23, 2009
Something cool
I had a meeting today with a fellow paper crafter(and fellow San Diego County resident)Terri Sproul. She shared a product new to me called the masquePen and it's very cool! The idea is this. in lieu of cutting out a paper mask, you just use the masquePen to paint one on. Anybody who likes to do masking for card making or collages will welcome this tool. I did a quickie experiment with it this afternoon. In the picture of the egg, every place that is light green was masked using the masquePen. The darker areas were inked right from the pad over the whole egg. The fun part is peeling the mask away after you've finishing coloring. You get a really clean delineation between the masked areas and the inked ones. Check it out here: www.terrisproul.com
Wednesday, April 8, 2009
Subscribe to:
Posts (Atom)


