Monday, January 28, 2013

Fun with the Halloween Die Cutters


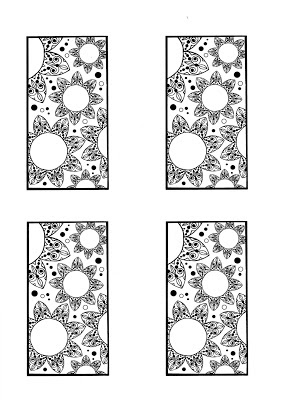
I taught a workshop over the past weekend in Cupertino (thank you Memories Live On!)using my Halloween Confetti die cutters in different ways. The five cards use the cut out shapes to make things other than what they were intended to be (mostly). The penguins in the upper left were made with my raven die cutter. The ornate frame was made with my bat, the sunshine card was made with the witches hat. The circle of cats was ...well you know and the dandelion was made using the spider die cutter. I will have step by step instructions for the penguins and the dandelions tomorrow. Feel free to print out the "Bat Frame" and try your own version of an ornate "zentangle-like" card.
Posted by Picasa

Tuesday, January 15, 2013

CHA 2013


I had an amazing time this year. Thanks to Colleen Baxter and the whole Viva Decor US team for making me feel so welcome. Looking forward to our joint project to debut at CHA Summer show in Las Vegas! Special thanks to all who came by the booth to say hi and to all my pals in the craft industry - this is our annual homecoming and I love seeing you all!
Posted by Picasa

Thursday, January 10, 2013

CHA 2013


Some samples for the Craft & Hobby Assoc. convention starting tomorrow. Come by and see me in booth 2773!
Posted by Picasa

Wednesday, January 2, 2013

December 2012 Card Challenge Winners


Here are the three winning submissions for the last challenge of 2012. At the top is not really a card but it is so pretty and clever I had to include it. It's a wreath made of clothes pins, playing cards and ten christmas trees - just beautiful! Lower left is a pastoral Christmas scene of real beauty and charm. I love the way the raindeer have been stamped giving them a vintage look. Lower right is a whimical skating snowman being towed along by a friendly little pup, all contained within a lovely scalloped frame. Congratulations to all three artists! I don't know who made the wreath but her/his Yahoo profile name is chavahtamar. The Pastoral scene was made by snitch45 and the skating snowman is by our old friend Birgit Edblom. Be sure to email me so I can send your prizes. Thanks to all who entered this month and keep up the good work!
Posted by Picasa

Saturday, December 29, 2012

Embossed Owl with Owl Flower Panel


Here is the first embossed card I made with one of my new Owl stamps. I also designed the background panel using a portion of the owl's wing to form a flower. You can print the panels below for your own use. There is also a tutorial on how I got the look using a free Goolgle program called Picasa. Enjoy
Posted by Picasa

Owl Flower Background Panels


How to manipulate the look of your background panels using Picasa by Google

If you don’t have Picasa on your computer, go to www.picasa.google.com and click the “download Picasa” button.


Copy and print the “Owl Flowers” background. Lay the copy on your flatbed printer.


Open the Picasa program and click the “import” button in the top left corner. You will be given a choice of locations to import the picture, choose your printer by clicking on the name of the model you are using.


A dialog box will appear asking you “what do you want to scan?” Choose black & white picture or text and click the “scan” button.


Your printer will begin transferring the image to your Picasa program, this may take some time. When the image appears on your screen, click “import all or import selected”. This action will import the image. Double-click the image and it will transfer to the tools screen. Here is where you get to have some fun with the image.


On the left you will see a long rectangular box with five tabs at the top used for manipulating your photos or images. They are:

1 Commonly needed fixes (wrench icon)

2 Finely-tuned lighting and color fixes (Sun icon)

3 Fun and useful image processing (paintbrush icon)

4 More fun and useful image processing (Paintbrush icon w/green background)

5 Even more fun and useful image processing (Paintbrush icon w/ blue icon)


Click each tab to see the different things you can do with each tool. Experiment with some of the tools to get the feel of the program. Remember you can always un-do anything by clicking the “un-do” button.


Here is how I got the look of the background you see in my sample card.


Click the “More fun and useful image processing “ tab

Scroll down to the Duo-Tone tool and click it.

Click on the “second color” button first. This will establish your background color. Move the eye dropper tool around the color spectrum until you find one you like. Remember, not too dark, this is the background.

Now click the “first color” button. This will color the flowers. Move the eye dropper tool around until you find a color you like and click it.

Click the “apply” button to save this combination.

Click the green tab again and choose the “Lomo-ish” option. This will give your panel a more intense color and create shadows around the edges.

Go to the center bottom of the page and click “print”

You will be able to choose the size and number of images you want to print onto your white cardstock.

Have fun!
 
Posted by Picasa

Friday, December 21, 2012

Best early Christmas present ever!


Here is Hannah Colleen Macke born 12-20-12 7lbs. 7 oz. 19.5inches, our new little Granddaughter.
Mom Amanda, Dad Max and baby Hannah are all doing well. 
Posted by Picasa