

 Posts
Posts


Friday, March 27, 2015
Congratulations!
I know I said I would announce the Blog Candy winner at midnight but honestly, I will not be able to stay awake! So I put the numbers from one to 32 in a hat (well, really a tupperware bowl) and pulled out the winner. Congratulations to Laura Holm! Your Easter goodies will go into the mail tomorrow. Happy Easter and good night all.


Thursday, March 26, 2015
Easter Blog Candy!

Saturday, March 21, 2015
Springtime Blog Hop
Welcome to my stop on our Yahoo Group's Spring Blog Hop!
My card is composed of a wreath of colorful punched flowers and leaves surrounding a little bunny from my Seasonal Silhouettes stamp set. To aid in keeping the wreath somewhat round, I attached the flowers all around the edge of a 3" round piece of cardstock in the same color as the background. I then attached the round to the center of the frame. It's a little cheat but it works great. The bunny was embossed with Pearlescent Ivory embossing powder followed by a pale pink dye ink applied with a foam dauber. I finished the flowers with Cream Pearl Pen centers. I hope this card gives you a little inspiration to join in our seasonal card making challenge which starts today.
Now, hop on over to my friend Hetty's blog for a real springtime treat! http://craftchaos.blogspot.nl/

Friday, February 6, 2015
Recycling Aluminum for Card Making
Instructions at the bottom.


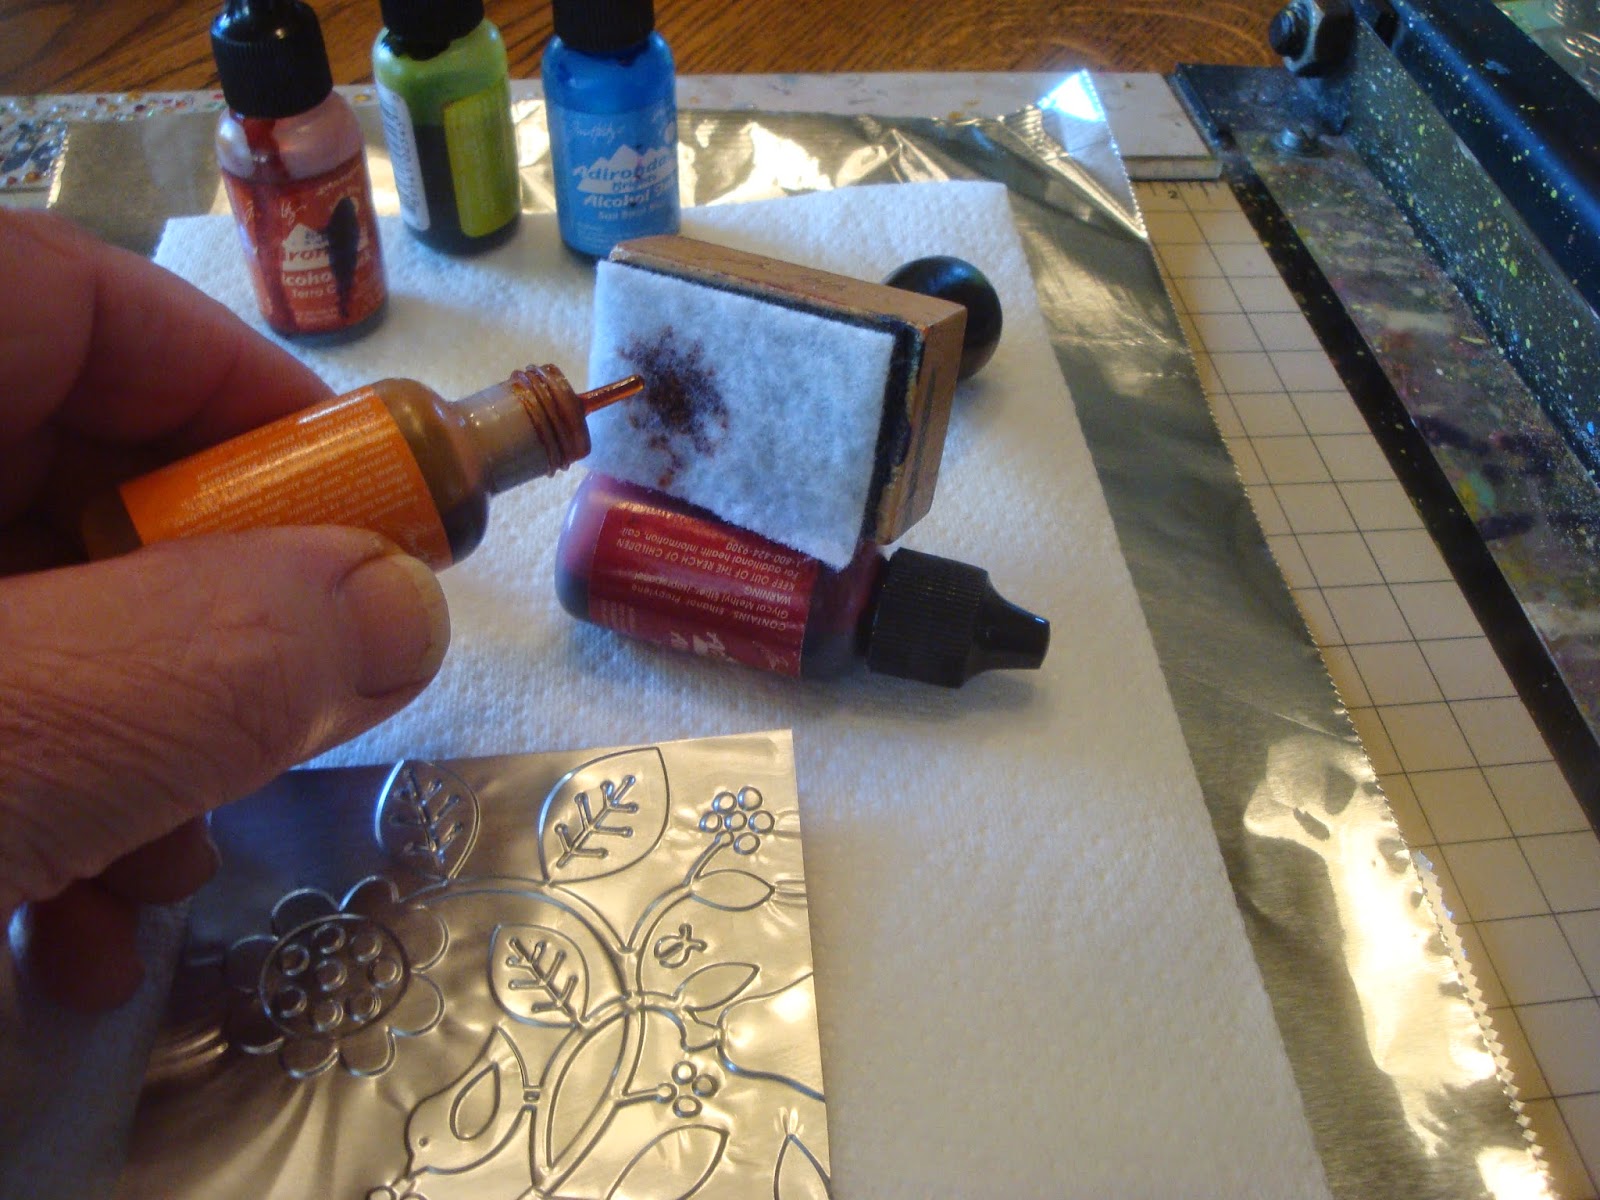


What you'll need.
Clean aluminum cans
Scissors with sharp points
Alcohol ink
Felt Ink Applicators
Cuttlebug embosser or any
other embossing machine (plus plates)
Embossing folders
Paper towels
Aluminum foil or silicone craft
sheets
Paper trimmer
Here’s how to do it.
Poke two holes in the side
of an aluminum can with sharp pointed scissors as shown.
Carefully cut around the
bottom of the can side and the top of the can side. This will remove the top
and bottom of the can and leave you with an open cylinder
Cut the cylinder from top
to bottom as shown. This will give you a long rectangle of raw aluminum.
Using a paper trimmer, trim
the rough edges away from the long sides of the rectangle. Trim the two short
sides of the rectangle. This will give you a piece measuring 8” x 3 ¼”.
For my cards, I cut this
piece in half to yield two 4” x 3 ¼” pieces. (side benefit – this sharpens the
blade of my cutter!)
Place the aluminum inside
an embossing folder. Be sure to put the blank side of the aluminum facing the
manufactures mark on the folder as shown.
Lay down a piece of aluminum
foil or a craft sheet under your paper towel work surface. Alcohol ink will
leave a permanent stain on your work surface so be sure to protect it. Also if
you wish, you can wear gloves to protect from staining your fingers.
Squeeze a little alcohol
ink onto the felt applicator. Rub the entire surface of the embossed aluminum
to make a base coat.
Add more ink to the same
pad and start dabbing the ink here and there onto the base coat.
Add drops of ink right
from the bottle here and there and let it puddle. The ink will react in different
ways to the texture of the design and to the dryness of the underlying layer of
ink.
Experiment with the inks
until you like the color placement. You can also come back in and use the applicator
to “blend” the colors a bit although the object is to make the colors as
freeform as possible.
This is addictive and fun
and a great way to recycle aluminum!
Enjoy.
Saturday, January 24, 2015
Year of the Goat Card
Here's a card I made with my little digital goat. You can print out the image below. Enjoy!

Computer tutorial :Changing the look of your images using Picasa3 from Google
Here’s how I made the black on white left facing goat
into a right facing white on black goat.
I have an HP all
in one printer/scanner.
I printed the image and placed it on the flatbed scanner.
I opened my Picasa3 program (free from Google).
I clicked on the “import” button in the upper left corner.
A new window will pop up asking you to choose from where to import the image. I
click on the drop down menu and find my HP 7520 series device. Click on the
button that identifies your devise.
You will see several options for scanning.
I choose “Black and white picture or text” and press the
Scan button.
Once the scanned image appears on the screen, click the “import
Selected” button.
The newly scanned image will appear in a new file with the
current date (at this time you may right click on the date and edit the file
description, I just add “Chinese Goat” to the file name for easy retrieval
later.
Double click on the goat. It will appear on the page
where you can do all sorts of fun things to the image. If you need to, you can
rotate the image by clicking the little rotation arrows right under the thin
blue bar below the goat.
To reverse the direction the goat is facing, press the
ctrl the shift and H keys at the same time.
To reverse the colors, click on the little tab with a
small paintbrush with the green square behind it. You will see 12 options. Click
the one called “invert colors” it will instantly change. Remember, you can undo
any changes you make by clicking the “undo” button,
At the bottom of the screen, press the print button. On
this page you will be able to choose the size of the goat and the number of
images to print at the same time.
Have fun and experiment with all the cool effects you can
get using this free program.
Friday, January 23, 2015
Blog Candy!
Here's a little digital stamp I made for the Chinese year of the goat. I'll post some cards a little later - enjoy!

Subscribe to:
Posts (Atom)